Showing posts with label Sewing. Show all posts
Showing posts with label Sewing. Show all posts
Thursday, June 26, 2014

Tuesday, August 31, 2010
Snack bags...snack bags... and more snack bags...


Want to move into her fabric studio and bury myself in the fabricky goodness. Yes, I just said fabricky.
More about poodles later this week. Lots more.
-S
Tuesday, August 24, 2010
Whew- what a break!
Wow- has it really been over 2 weeks! Time has flown by here. Girl #1 started kindergarten. We love it. She even takes the school bus. She's growing up so quick! I know how fast it goes, so I'm really trying to enjoy the baby stage with #3. She's all over the place, crawling, standing, couch cruising. It's exhausting, and really putting a damper on the sewing. My machines are in the "studio" aka guest room, which is through our laundry room. Totally not within arms reach of our very mobile baby.

I've been sew busy lately, too! I finished this custom quilt for the preschool director.

It's for her first grandbaby, and I sewed it with so much love. She had been hanging on to the Alexander Henry "Dick and Jane" fabric for ten years! Her daughter loved it so much, that she commissioned me to do a crib bumper and sheets to match- such a fun project!

It's hand tied with pretty pink crochet thread on all of the joints.

This is a poor picture of the back, but it's white minky with a focus strip of the "Dick and Jane" fabric.
In other sewing news- I'm teaching 2 classes at Quiltz this fall! The first one is the Hippy Chick Skirt pattern by Pink Fig, and the second is Serger Basics. I'm super excited about it- if you live in the Phx area- stop by and say "Hi!"
-S
Sunday, August 8, 2010
Where have I been?

I've got lots on the burner: 3 sets snack bags, 1 custom baby quilt, 1 t-shirt quilt, 1 diaper bag, 3 huge ruffle ribbon orders. And one poor 9 year old baby blanket that met the playful personality of a golden retriever. When it rains it pours, right?
Oh yes, while I was in the San Diego area, I went to Maisonette. It was heaven.
-S
Thursday, July 22, 2010
Maybe I should move to Australia?
No luck on the button hole.
My camera however- that's a different story. After spending a good chunk of time googling, calling, researching and generally messing around with the contraption, I figured out how to make it work-
JUST USE IT UPSIDE DOWN.
Seriously. I have to aim, focus, shoot and use the menu- all while holding it upside down. It's a nicer model Canon, and it would be at least 120 to fix it- so guess what?


My I-Spy squares came! There are some really great funky fabrics in the mix! I'm excited to get started on it. Trying to finish the New Wave first.

I cut 4 ea from each FQ- 9"x10.5". You cou;d make them bigger- but I thought this was a great everyday size. I used a .5" seam allowance, turned, pressed, and then top-stitched with a decorative stitch. I use any excuse I can find to use the fancy stitches that came on my machine. Trying to finish up a few projects today-


My camera however- that's a different story. After spending a good chunk of time googling, calling, researching and generally messing around with the contraption, I figured out how to make it work-
JUST USE IT UPSIDE DOWN.
Seriously. I have to aim, focus, shoot and use the menu- all while holding it upside down. It's a nicer model Canon, and it would be at least 120 to fix it- so guess what?
I'm moving to Australia. Just kidding. I'm just practicing using it the new "right" way before we go to the beach in a few weeks.

Ruffle coin purse

I've been working on a few new products for fall. I'm thinking of retiring the BlueberryKisses etsy shop. I've already reserved one under my new dba name Hustle Mama, as well as a BigCartel shop. I've heard lots about the difference between the two, and am intereseted to see how BigCartel evolves over the next few years. I used some of my free custom printed twill tape as the edge tag (does that have a technical term?) I love this stuff, and love twill tape in general. I can't say enough nice things about working with Jon at twilltape.com. Plus, I ordered this on wednesday afternoon, and got it friday. For reals.
In Quilting News:My I-Spy squares came! There are some really great funky fabrics in the mix! I'm excited to get started on it. Trying to finish the New Wave first.

Didn't fix this pic- still upside down.
My aunt had picked up some great FQs for me in Seattle of foods for my I-Spy project. I decided to turn around and use them as a thank you to her for putting my whole brood up for a week. I thought they would be such fun cloth napkins! They are turning out really lovely, and I think I'm going to make some for us to use at home. What a great way to go green! I cut 4 ea from each FQ- 9"x10.5". You cou;d make them bigger- but I thought this was a great everyday size. I used a .5" seam allowance, turned, pressed, and then top-stitched with a decorative stitch. I use any excuse I can find to use the fancy stitches that came on my machine. Trying to finish up a few projects today-

(Another great hostess or thank-you gift)

Turned this pile of white bar towels into safari themed powder room towels for my MIL.
-S
Friday, June 18, 2010
Skirt Week Entries!

Aaaahhh.
Skirt week entries submitted. I actually completed this seersucker number with 75 minutes to spare. Who says I'm a procrastinator? In my defense, I thought the deadline was monday...

I really think my 5 year old is going to be a wonderful photographer- she took every single one of these (except the one of her!)

It is basically this OliverandS skirt, with some mods. I added pockets in the same LOVEly Amy Butler fabric. I also made a flat front waist band, with the elastic gathering in the back. I seriously whipped up the whole thing in about 90 minutes, with all three kids clamoring for dinner and bed. I had been working on it in my head for 3 weeks, though! I love pockets- they make it soooo easy to run in anywhere with all 3 kids in tow...

This was with 60 minutes to spare- but hey- who doesn't have time for a little Ring-Around-the-Rosie? (this was not for the photo shoot- we actually played, and then the sprinklers came on, and the big girls and I ran through them- I need to remember to "play" with my kids more!)

I use this tutorial from Ruffles and Stuff to make this skirt- although the technique is the same as the birthday skirt below. So fun and flattering!

Another shot of "Date Night" skirt- I called it this, because even of you gorge yourself at dinner- it's still flattering!

This is Avery's birthday skirt. I made it along with a matching "5" shirt. I have a secret to making this twirly skirt- and plan on sharing it in a tutorial in the next few weeks. She loves this skirt and would wear it everyday if I let her. The birthday shirt is already showing her belly- she has grown over 4 inches in the past year- insane!
Have a great weekend, and be sure to spoil those Daddys in your life on sunday!
-S
Wednesday, June 2, 2010
Negotiations, and makin' money
The lovely Becky (give-away winner!) and I have been chatting about her bag, and I gave her the option to special order one. This brought up the issue of fabric choices, which brought up the issue of this:

Yes, that is my sewing closet. Not tidied up for a photo, but pretty much as you'll find it any given day. Usually there's one or more girl-child digging through it, actually.
"Why do I have so much fabric?", you ask. Believe it or not, I do make money sewing. In the interest of full disclosure, I make enough money sewing to support my fabric habit. And maybe a smidge more. If you sew, I encourage you to put it to work for you!
A fews way I make money from sewing:
- Etsy
- Hemming/Alterations
- Special Orders - You'd be surprised at how many people have small projects, or big visions that they are willing to pay someone to execute. i.e.,curtains, table cloths, pillow covers, birthday presents, personalized gifts, etc.
- Churches/preschools (these typically have special items that require tailoring. Curtains, mini placemats, aprons, etc)
Don't be afraid to put yourself out there to anyone and everyone- in other words, "Hustle!"
-S
Friday, May 28, 2010
Somebody stole the spotlight, and a giant zucchini

This is the first zucchini we harvested from our garden! One of the good things about living in the desert, is we have 2 non-traditional growing seasons. Still waiting for our peppers, eggplants and all melons to come in. Looking forwards to grilling this guy on sunday! We are having good friends over, lots of kids, jello shots, and a Slip-N-Slide! Should be so fun!

I made another version of this top, this time using a tee shirt from the dollar store, and some AMH Good Folks. I love it! First time I've ever made something twice. Somebody thought my bathroom photo shoot was about her. This was actually the best photo.

Just to give you a little perspective on the size of this thing! Huge!
Happy Long Weekend! -S
Wednesday, May 26, 2010
Easy embellished T-shirt to skirt, a la Alabam Chanin

My mom and her husband came over the other night. I still have my "Spring" banner hanging on our front door, and she says, "You should probably change your banner". I said, "What? to 'Hell?' "
Because that's what we get here in phoenix: Winter, Spring and Hell. No Fall. And no Summer.
It goes from pretty nice and breezy to unbearable in about 90 seconds. We're not there yet, but I feel it coming.
Summer here is so undescribable. Imagine getting burns from your car seat buckles. Not being able to breathe the air in your car if you get into it after it's been sitting in a parking lot. I was pregnant last summer, and didn't want to wear anything but a mumu. I had two black dresses that I wore every single day. My summer wardrobe this year is sadly lacking, due to my physical state last summer.
I decided to make myself something from a pile of ever-growing knits in my sewing room.
I'll start by saying I love dying. I lerve it! I may or may not have dyed underwear. For my hubs. (He wears them as often as they are clean!!!) I probably dye once a month or so. It's a good way to cover up preschool paint stains, sweet potato baby food stains, sweaty pit stains (read a few posts ago if you want the inside scoop on that!), coffee spots, etc. Dana at MADE has an awesome how-to on dying in your sink. It's really quite easy. Whenever I have my buckets of dye out, I go through the dressers and pull anything white. I recently pilfered several of the hubs Costco tees. One went in the black (still uncut!), one went in the pink ( a cute pair of gaucho sleep pants!tutorial to follow), and one went in the brown. I pulled out the brown one this morning, and got to work!

Tee as is.

Cut carefully around sleeves, and straight across the top.

Raid scrap stash for other fabrics you think will go well. I picked piece of pretty robin's egg blue knit from an old yucky tank top. Lay across t-shirt. Imagine a beautiful abstract pattern.

Starch is my secret knit weapon. Did you know if you spray the back of your top fabric, and then press it on, it will stick? I use this trick all of the time! It's like temporary adhesive! Awesome! I sprayed the back f the blue piece, and then ironed it onto my brown shirt. I find it's better to tap the iron. It you pull the iron back and forth, your knits go all wonky.

See? Nice and smooth.

Next draw your beautiful abstract design with water or air soluble marker.

Stitch the design. I always use a ball point needle when sewing knits. Another trick I've found to walk my machine around tight curves is to go in two stitch increments, lifting my presser foot and adjusting the entire garment every two stitches. Never pull knits. They will distort. This may sound tedious, but this whole piece took maybe 15 minutes.

CAREFULLY trim around your appliqued pieces.

Next I picked a pretty cotton that went with my design. Iadded a few more whirls and swoops, starched my cotton scraps to the underside of my brown shirt, and stitched using the same "two-stitch"method.

Carefully trim the brown away from inside these last areas, leaving a reverse applique.

Isn't it pretty? Very Alabama Chanin, if I do say so myself.

Next I made a casing to accomodate 1.5 in elastic. I like thicker elastic on adult garments. It looks more professional.Carefully thread in your elastic, being sure not to twist it. It's very noticeable on thick elastic!

Try on! have 5 year old take pics of you, which you then have to edit to high heaven.
Sheesh. Help these days.

Close up of applique/reverse applique.
Finished product! Total time: approx 1 hr. Total cost: about 2 bucks.
btw, I left this skirt on all day after the photo shoot! So comfy and cute!
And, just in time for the crafterhours: Skirt Week! I adore these gals, and am so excited!
-S
Thursday, May 20, 2010
Tutorial: Reversible Tote Bag
This is by far the most popular item I sell in my etsy shop, or locally. It's functional, practical, cute, machine-washable, reversible, totally lovable! I call it the "Momma Tote". When I got back into sewing about a year and a half ago, I started in with bags made out of home-decor weight fabric. There is a local store near me that sells it for 3 bucks a yard!!! 3 bucks! Crazy! It is sturdy enough to hold a good shape with-out interfacing. Most big box craft stores carry it, (just not for the crazy price of 3/yard!)

 Fold each pocket in half right sides together, and sew around three sides, leaving a spot for turning. Clip corners, turn and press.


 Miter corners. Do this by popping open the bag with one hand, pressing the bottom flat. I measured 3.5" from side to side and marked. Sew back and forth along this line several times. I serged the edges after sewing. You can also just trim.


Turn outer bag right side out, and stuff into the inner bag, right sides together. Pin strap into place, with the right sides together. The strap will be inside the bag "chimichanga". That is where it belongs. Have faith. It will all come out the right way.
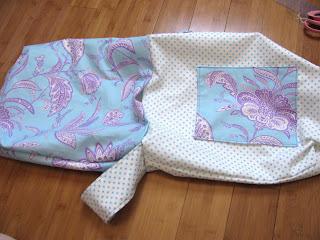


Choose two corresponding fabrics, we will call them outer and inner. Cut 2 rectangles 16"x18" of each outer and inner. Cut 1 rectangle 8"x12" of outer and inner. These will be pockets. Cut one 4"x 44" length of outer and inner. This will be your strap.


Turned and pressed pockets.

Top stich along one shorter edge of pockets (merely decorative), and attach 3 sides to one side each of outer and inner. Be sure to stitch back and forth a few times along the top where it attaches, this area will see a lot of pressure.

Sew outer together, right sides facing. Repeat for inner. I used a 5/8" seam allowance.

Sew strap along one edge, with right sides together. Open up and press seam to one side. Press one side up by 1/2".

Press remaining side in 1/2" to meet other side.

Press the entire strap very well. Sew each side with a 1/4" top stitch.

Strap


Serged edges.

At this point my assistant got a little fussy. I let her help. She's very demanding.

Turn outer bag right side out, and stuff into the inner bag, right sides together. Pin strap into place, with the right sides together. The strap will be inside the bag "chimichanga". That is where it belongs. Have faith. It will all come out the right way.

Stitch around the entire bag with a 1/2" seam allowance, leaving a gap for turning.
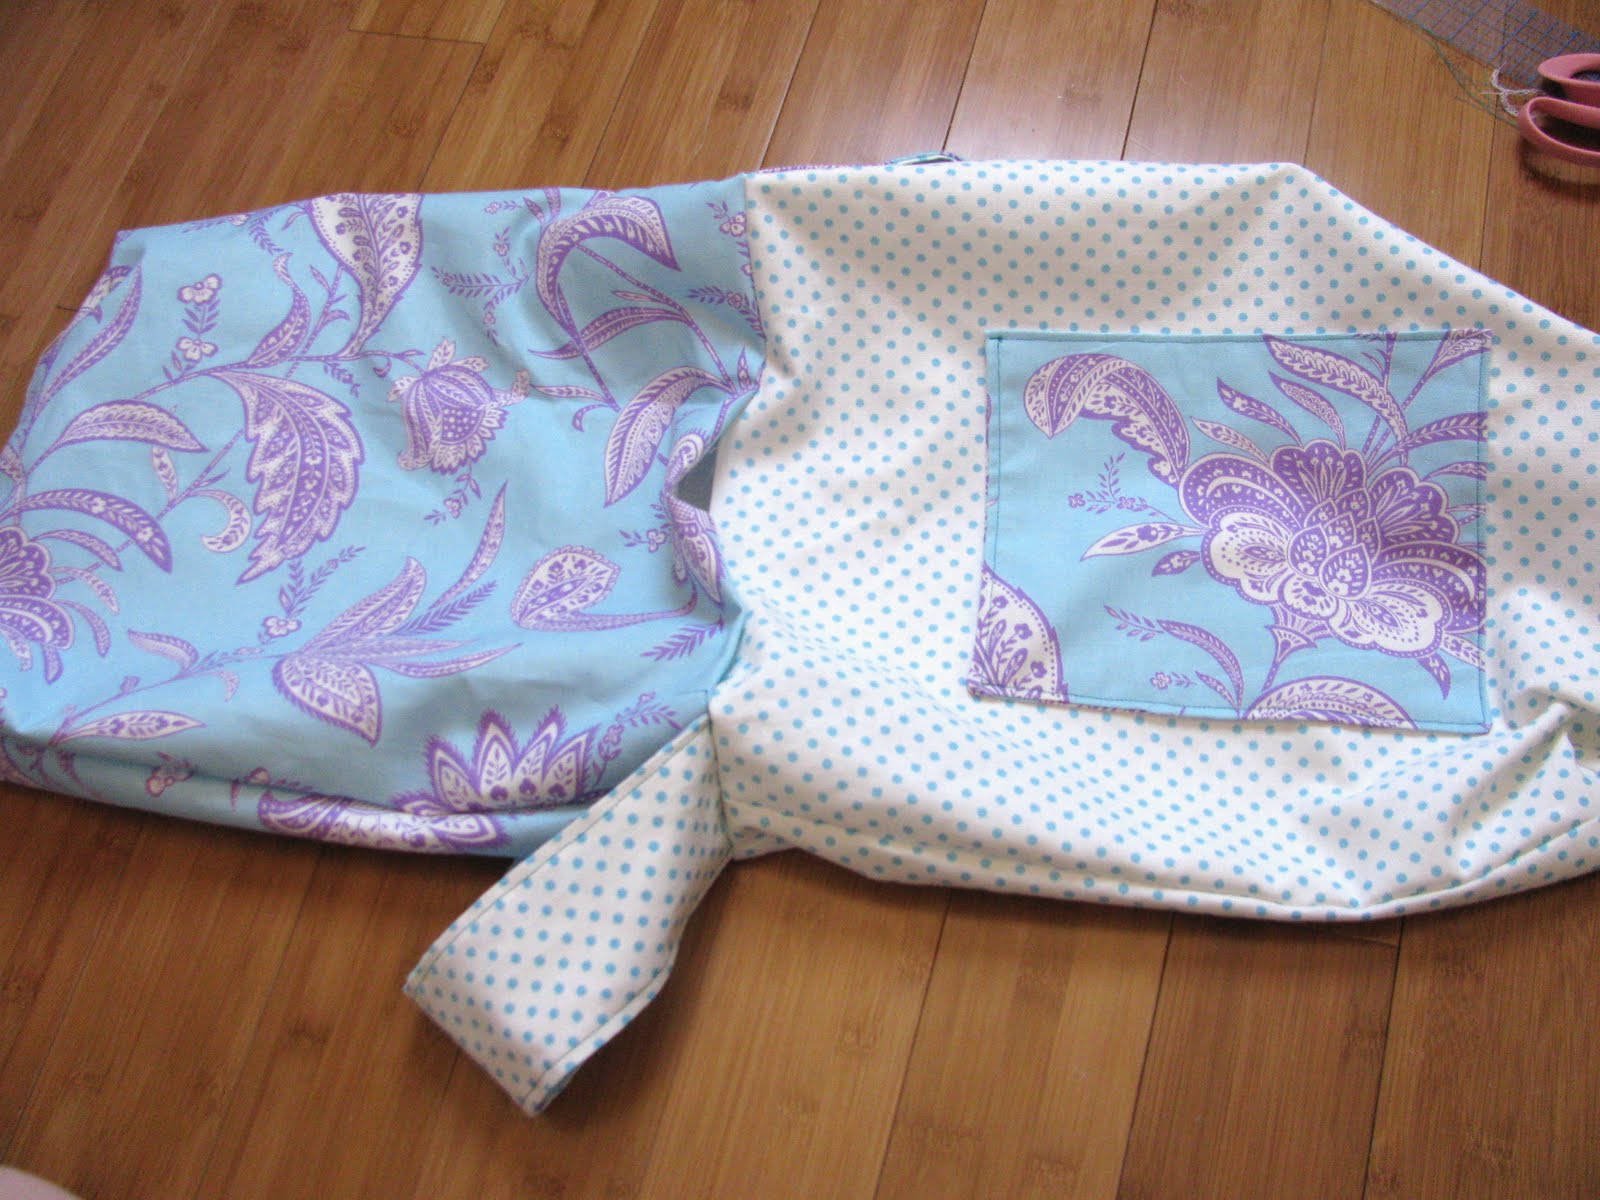
Pull the whole bag out through the opening (I love this part!)

Stuff the inner bag back inside the outer bag.

Press and top stich 1/4" away from top edge. Congrats! Take it to the beach! Or the pool, if you live where I live...
Enjoy- Feel free to comment with any questions! -S
Subscribe to:
Posts (Atom)


 Posts
Posts